Friday, April 24, 2020

Digital Class Meeting Ideas


So many teachers are spending a lot of time on online video call platforms to connect with students right now. In addition to our remote learning on Google Classroom, I am hosting two meetings a week with my homeroom students, just to connect, play games, and check in on them. We are not doing any teaching during our calls, so I am quickly running out of things to talk about and games to play with my students virtually. 

I have put together a list of games, topics and themes to do with students virtually.

I've also added a link to a freebie at the end to one of the games I made for my students to play!


Topic Questions: Some days, I provide a topic to students ahead of time to think about. Then, we go around to each student and let them share. Between this, general conversation and allowing time for any questions, that can usually fill up my 30 minute call.

  • What is something you miss doing? 
  • What is the best part of being at home? 
  • What is something you're looking forward to? 
  • What advice do you have for your classmates to make this time at home easier? 
  • What are you reading? 
  • What book recommendations do you have for others?
  • What technology have you been using during this time at home? 

Theme Calls: You can have students participate in the theme, then go around and share what they are wearing or why they chose what they did. 
  • Crazy hair
  • Wear a hat
  • Sport Team - wear a jersey or colors of your favorite team
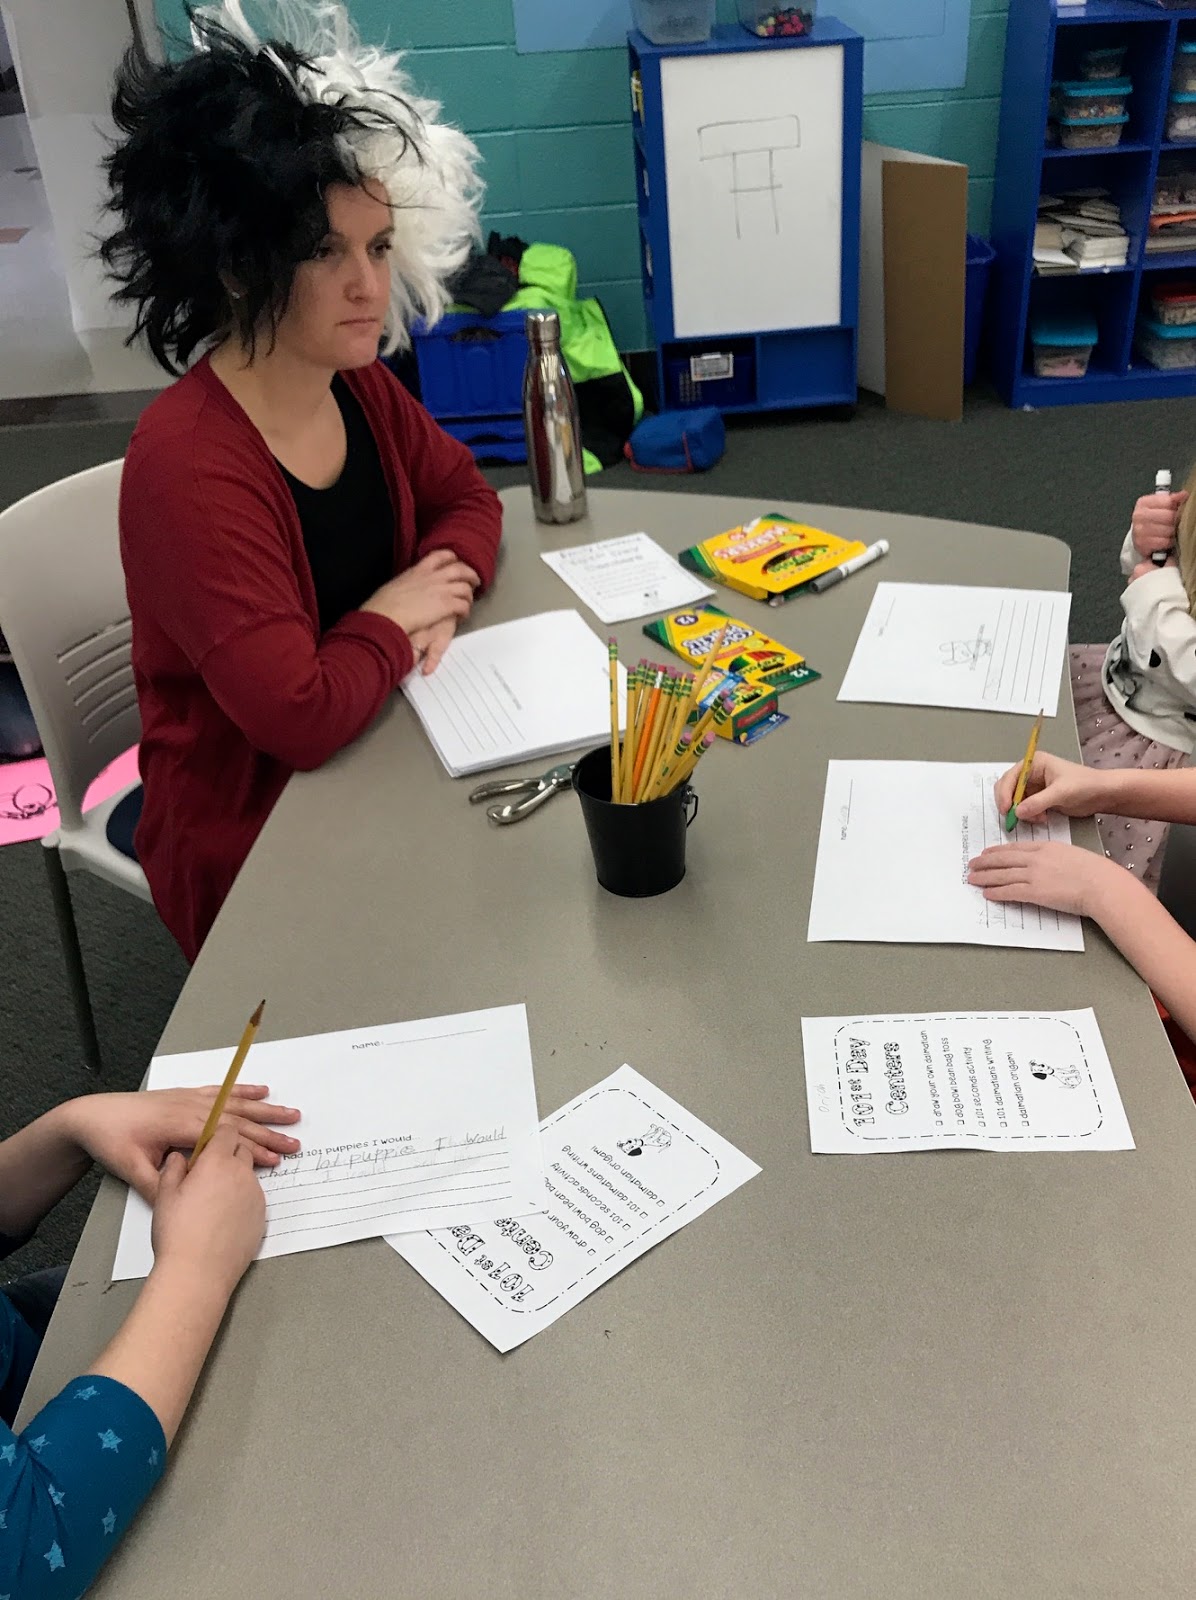
  • Costume - pull out an old costume to wear to the call
  • Crazy socks - may be a little harder to show on camera, but could still be fun
  • Wacky Outfit
  • Pajamas
  • School spirit

Activities: 
  • Show and Tell - bring an item to share
  • Bring a Guest - invite a family member in your house to join the call and introduce them to the class
  • Would You Rather - See my freebie at the end! :) 
  • Scategories
  • Scavenger Hunts - There are a lot of ideas floating around for this one. You could theme it to your subject or make it random. You can also do different themed scavenger hunts on different days. 
  • Read a story
  • Do a science experiment for them or have them share one they've done
  • Share a simple recipe
  • Share a website - Find a new game website or a student-friendly research page
  • Do a GoNoodle 
  • Family Game Night - I saw this idea somewhere, and I'm working out the details of planning this. Possible future freebie! 
  • Learn a dance together - TikTok dance?! ;)

Guests: Invite a guest to also be on your call and share with students. 
  • Specials teachers
  • Guest readers
  • School counselor
  • PE Teacher
  • An essential worker, first responder or nurse that you know that you could have on to have the kids thank
Comment below if you have other ideas to share with other teachers! We've got to all help each other out during these crazy times. 

Check out my Would You Rather freebie here! 


Share:

Saturday, March 14, 2020

E-Learning Resources


I have added some and am continuing to add resources for teachers who are planning e-learning. Here in Illinois, we have had little time to prepare for school closures. With that, I am trying to put together as many resources as possible for teachers to use to help with planning during this time. Just click on the Tech Tools tab and see the tips from IDEA, video tutorials, and a link to a Google Slide with websites and resources that may be helpful during this time.

Thanks & stay healthy,


Share:

Monday, May 27, 2019

Field Day 101


When I started at my last school, I was told that I had inherited the position of planning field day. I was overwhelmed at first, but we have had some very fun field days! If you are in the position of planning field day, here are some of my favorite activities and tips from the past.

Scheduling

Our field days were typically a whole day. We also did field day with our entire elementary, so we tried to switch things up pretty often. Usually our last day was field day, and we had an early dismissal. Here is the general schedule we followed:

8:30 - 9:30 Outdoor Games
9:30 - 10:00 Snack break/Recess
10:00 - 11:00 Indoor Games/Minute to Win It
11:00 - 12:00 Staggered Lunches/Recess (Some games on your own in classrooms)
12:00 - 2:00 Outdoor Games & Activities

Obviously, if you have multiple grade levels, or larger class sizes, just make this a rotation, so different grade levels go to the activities at separate times.

Outdoor Games

In the morning, we usually started with either some group games or special outdoor games during a free recess. We set up stations around our playground. This way, students could have recess, but also enjoy some additional activities. We set up things like Frisbee tic-tac-toe and outdoor twister. I used a shower curtain to make a tic-tac-toe board, but that could also easily be drawn with chalk if there is a blacktop or sidewalk available. Then, students throw Frisbees to place their locations. For the twister, I cut a circle stencil and used spray paint in the grass. We also put out additional bonus supplies like chalk and bubbles that the students didn't usually have available at recess. Other fun things to add could be found at the dollar store, like foam airplanes or other catch games. When we were doing a water theme, we used inflatable inner tubes for human ring toss.

Snacks

Every school has its own rules and stipulations about doing snacks, but we had lemonade and popsicles most years. This was pretty easy to make and serve, but was a fun treat for a day outside!

Indoor Games

We loved doing minute to win it games. Of course you can find so many ideas online, but some of our favorites were as listed below.

  • Cookie Face - Try to get a cookie from your forehead to your mouth without using your hands
  • Cup Stacking - Have students race to stack cups into a pyramid and then back down
  • Panty Hose Bowling - Put a tennis ball at the bottom of a pair of panty hose, students put the hose on their head and have to knock down a row of water bottles
  • Tissue Toss - See how fast students can empty out a box of tissues
  • Junk in the Trunk - Put empty tissue boxes with ping pong balls in them around students' waists - they have to wiggle around to get the balls out of the box
  • Feather Blow - Use straws to blow a feather across to a marked line
We also had backup plans for board games or a shortened list of relays if we had to be inside for the day in case of weather. 

Water Activities

If you choose to use water for your field day, there are so many fun games you can do with water and water balloons. We always let parents know ahead of time that we would be getting wet that day. Here are some that we played:

  • Water Passing - Students stand in lines and have solo cups. They have to pass the water from their cup to the next over their heads, without turning around.
  • Sponge Fill - A relay game with a bucket full of water at one end and an empty bucket in the front of their line. They take turns running down to fill their sponge, then empty the sponge into the empty bucket. 
  • Water Balloon Balance - Like an egg relay balancing on a spoon, but with small water balloons
  • Water Gear Relay - Students have to run down and back, passing goggles and floaties to the next runner to wear
  • Water Balloon Baseball - Take turns hitting water balloons with a wiffle ball bat
  • Water Balloon Toss - Students pass the water balloon back and forth taking a step back each time
Outdoor Activities

We also liked just playing relays each year. This is a great option if you do not want any water activities. 
  • Beach Ball Pass - Students have to pass a beach ball down a line without using their hands
  • Three Legged Race
  • Sack Races
  • Shoe Race - Students put their shoes in a big pile and take turns running down and finding their shoes
  • Silly Walk Relays - Crab walk, bear crawl, running backwards
  • Clothes Relay - Students have clothing items they have to run down and put on, then take off to pass to the next runner
  • Human Knot - Students are in groups and have to all grab the hand of someone not next to them, then they try to untangle without letting go of hands
  • Tic Tac Toe Relay - Use hoola hoops as the tic-tac-toe board and students run down, place a ball or place holder, then run back and try to get three in a row before the other team
We also would do outdoor group games like playing with a parachute or kickball. One year, we were even able to rent an inflatable obstacle course! 


Competitions

It can be fun to make the day a competition between classes! The winning class could get extra time at one of the popular games, like an inflatable. One year, we let the winning team silly string all of the teachers! We have also given out small prizes like flower leis.

Parent Volunteers

Be sure to ask for parent volunteers! This will make the day much less stressful. You will want to assign them to the different stations or have them run the games or races.  You will also want some who are preparing things like the snack or upcoming games or filling water balloons. It will be loud and exciting, and you will want to enjoy it with your students!

I hope that some of these ideas make planning your field day much easier! If you aren't already there, you are close to the end of the year. Enjoy this time with your kiddos and have fun!


Share:

Sunday, December 23, 2018

Google Classroom Basics

One of my favorite online tools to use when you start flipping your classroom or go 1:1 with technology in your classroom is Google Classroom. This may seem pretty basic to some, but Google Classroom is always changing and these are some of my favorite ways to use it.

Uses for Students

1. Sharing Content

To share a post, you can just start typing in the top box on the stream. I frequently use Google Classroom to post website links or resources for students to use in their work. In a flipped classroom, you can also easily upload videos with lesson content, or add in video links.

*To upload a video, simply record a video from your device. Then, when you go to create a new post, you can attach a video. This can be done from a phone or iPad, as well as any computer you are using as long as you have the camera and video recording available to you. (Sometimes I also upload to YouTube and then insert the link - this allows me to share the link in other ways, but does add some extra steps in uploading.)

2. Assignments

You can create assignments on Classroom as well. At the top of the page, click onto the Classwork tab, then click the Create+ button, and select assignment. This can be a blank assignment - I use this for the spelling tests I mentioned in my Spelling City post. You can also add files from Google Drive and set it so that it creates a copy for each student. This is great for template or "worksheets" that you want students to complete. Once they have made their changes, they just click "Turn In." You can also still see the files even if they forget that step!
3. Assessment

Google Classroom has made changes that make it very easy to give quizzes to students. Create a quiz using the quiz feature on Google Forms. This allows you to create a form, but you can also add correct answers and points for each question. If students answer exactly correct, the grade will already be there. For other answers, you can choose to have it automatically marked wrong, or you can go through and select the correct and incorrect answers. It groups them together, so even when I have used this to grade 130 quizzes, it can be done in a very short amount of time! Then, when you add the quiz onto Google Classroom by either adding it from your drive as an assignment or creating a quiz assignment, you select to have grade importing. Then, students' scores will show up right in the assignment after you click to import them.

4. Collaboration

Students can also comment and create threads on Google Classroom where they can work together. The settings can be changed to allow comments or to turn them off, but this could be a powerful tool in a flipped classroom. Students can ask and answer each others' questions both inside and outside of class. Similar to an online class, the discussions can add a lot to student comprehension.


Sharing with Educators

This is also a great tool to use to share information with other educators. You can create a classroom for educators to join for professional development. You can have them working through assignments as students to better understand classroom, or hold other forms of professional development, like book studies through this platform. It would be great to use it to teach educators all they can do when they start using it in their classrooms!


Google Classroom is a great tool for turning over some of the power in the class to better empower students and give them some more control over their learning. This can be done in small ways or in larger ways like starting the switch to a flipped classroom!


Share:

Tuesday, December 11, 2018

Spelling Tests with Easy Grading!


Teaching in a departmentalized fifth grade this year, I was dreading grading 130 spelling tests every week. I knew that I couldn't offer the tests on Google Classroom because Chrome will correct spelling for the students. In order to take the headache away from spelling tests, I made two changes.


First, I started giving a test every other week. I give a pre-test one Friday and the test will be the following Friday. This gave students more time to study, it gave me more freedom with my lesson plans, and it took away from the student workload.

Second, I started giving tests on Spelling City. I use the free version, so I was having students take the test, then show me the score. I walked around the room to record it, and students had the option to print it if they wanted a copy. After the first week, I had parents asking for copies of the spelling tests, which I didn't have. The second week of doing this, our Cloud printing was down, so students couldn't print their tests. I knew I had to have a way to keep a copy of their test. I thought about asking my school to purchase Spelling City, but we wouldn't be using it for all of the other awesome features you get when you subscribe, we would only be paying for it so that I could see the students' work.

Here was my solution - I'll warn you, it does seem complicated, however, my fifth graders picked up on it really well. After the first day of showing them, I had 1-2 students in each class who got it right away and went around helping others. By the second time I did it, most knew on their own, and I am hoping that the third time will work like a charm! :)

I have the students hit the print button on their test, then save it as a PDF. (They could also click on the download button, but that doesn't give them the chance to choose exactly where to save or rename.)

Then, they go into Google Classroom where I have assigned them the spelling test. They attach the file to their assignment and submit.

This makes it very easy to go through and record grades right there in Google Classroom or in your gradebook.

I also added the PDF Mergy extension to my drive.

This allowed me to select all of the tests and make them one file to print. That saved me from needing to open each document separately to print them. (I know that not printing them would be a good alternative as well, but many parents still want to see these tests!)

Again, I know this seems complicated, but the students picked up on it very quickly. Also, I think it is a great tech skill to teach them. Part of our job of including technology in the classroom is to prepare them for technology use outside of school. So much of technology includes troubleshooting and attaching documents. Going through this process teaches students both of these things, as well as makes them more aware of technology vocabulary and practices.

This has made spelling tests in my classroom so much easier, and I hope it does the same for you!

Share:

Wednesday, November 21, 2018

Saturday, April 14, 2018

The Great 4th Grade Baking Show


 A fraction room transformation. Are you excited?


I was so excited for this room transformation. Let me start by saying that it cost me about $70. I was honestly a little worried about the cost of supplies on this one, but it didn't end up being too bad. If you have a bigger class and need more supplies, depending on your district, you could easily get some of the actual ingredients donated by families.

My students needed some extra review on simplifying fractions and changing improper fractions to mixed numbers. I knew a recipe would be great practice for this, and I have been hearing so much about the Great British Baking Show on Netflix, that I decided to run with it!

I wanted to use a recipe that was no bake, so I just searched on Pinterest for a no bake recipe and found this one. I retyped it and I changed all of the measurements. For example anything with a 1 became 3/3 or 5/5. The 3 tablespoons was 12/4 tablespoon and a half became 7/14.

Next I hit up WalMart. I got a few table cloths, lots of storage containers, and some additional spatulas and measuring cups (they have some great, cheap ones!). When I got home with the ingredients and supplies, I measured them out into separate containers. I was sure to add the amount they needed, plus some, so that they would actually have to measure.


I wanted to have individual containers so that almost everything they needed was at their work station. There was one area in my room with the shared ingredients like vanilla, whipping cream and milk. Then, I had a station with a microwave and two hand mixers. I have a co-teacher in my room during this time, so she manned the hand-mixers for me.


I had talked with students the day before about how we use fractions in recipes, so they had some background knowledge. Then, that morning I greeted them at the door, had them leave their things in the hall, and welcomed them to the Great Baking Show. They had already been working in groups for math, so I told them to find a table with their group and do not touch anything. (I actually told them their team would lose points if they touched anything, but there were not really any points to be won or lost in this lesson.)


I showed them a clip on Netflix of the Great British Baking Show just to further set the stage and let them see how to act and how we would be "judging" them. Honestly, the hardest part is once you hand the recipe over to them, not helping them. I did step in once when a group was about to add a half a CUP of VANILLA! I started to freak out and then just said, "Are you sure about that?" and they caught the mistake.


I walked around taking notes of things I noticed, any inaccurate measurements, things they were doing well or struggling with, and so on. I also asked them to write on the recipe what measurement they used so that I could look that over later as well.

That afternoon, I had two other teachers join me as we judged. We tried our best to sound like judges on a baking show and we did rank them. The kids handled this so well. They knew what they had done wrong and it was a great learning experience.


I have been super into brain science lately and kids actually learn so much more when they make mistakes! That's why I wanted them to make those mistakes rather than have me correcting them while they were baking. The kids were begging me for a copy of the recipe so they could go home and try again! What better ending to a lesson is there than that?


Share:

Mario Multiplication


Multiplication. Ugh.

When I got around to teaching two-digit times two-digit multiplication this year, I was dreading it. Hardcore.

Looking back at past years, one of the biggest problems I had was when we moved into the process of actually multiplying the two numbers. The students would go through the process with me just great, but then they would look for shortcuts when they went to do it on their own. I wanted them to remember that there were three steps: multiply the ones, multiply the tens, then add them together. This reminded me of the three laps in a Mario Kart race, so my room transformation was born!

This year, I decided I needed to come up with a different way to teach this. Now, I want to reinforce that I surrounded this specific lesson with exploratory activities as well. This lesson does focus on the process. 

I was brave enough to decide that this room transformation would be done during my observation, so I do not have a ton of pictures. However, it went great! Several of my students had never even had an opportunity to play a Wii, so this was a cool experience for them.

I bought several table clothes and some racing decorations at Hobby Lobby. There are a ton of things I would have added from Amazon, but I was trying to keep it cheap and it was a bit last minute, so I found things I didn't need to order.


Most of my time went into the PowerPoint I was using. I created a step by step animated slide show with practice problems that I used to go over the three steps. These were pretty basic problems, but I really focused on how it is like three laps, and of course I made sure the slide show was themed to match. I did have the students follow along on whiteboards, but I don't know that I'd do that again, at least not for the first few problems.


My biggest undertaking, aside from the PowerPoint was the cars. Now, I did only have 9 students in my classroom for this lesson, however, you could easily add some cars (they really didn't take, TOO long) or just rotate the kids that get to sit in them.

After the PowerPoint, we did practice problems while we played Mario Kart. The students would race a lap, then do the first "lap" or step of the problem. Then, they would do another lap and another step. We just paused the game after the first person started the next lap each time.


At the end of the lesson, we did some individual practice problems and I just reinforced the idea that there were three steps. If I would have changed anything, I would just add some higher level thinking in some way, possibly through the practice at the end.

This was so much fun and I really think having something to connect the problems with made this tricky multiplication much easier for my students to handle!

Share:

To the Discouraged Teacher


Dear Discouraged Teacher,

We all go through times that are difficult in the classroom. Whether it be because of students, parents, co-workers, administration, friends, or any other factor, know that you are not alone. Even the best teachers go through these times (I am not one of the "best" teachers, I've just heard this from them, too ;).

Let's be honest, teaching is a hard job. It's a job that doesn't always come with enough "thank you"s or recognition. Sometimes it feels like you are doing so much work with very little return. It may feel like no one understands what you're dealing with. It may feel like no one appreciates your time and effort. It may feel like others are judging you.

I wish I could say that things will get better, but sometimes these are just things that we have to deal with. However, there are three things you can focus on to help get you through it.

keep in mind the students

The reason behind the stress and the tension are because we are trying to do what is best for the students. There are times that no one outside of your classroom will understand that. When I have a crazy idea that I do not feel is supported by parents, sometimes I have to persevere through it before parents understand why I wanted to do it. Other times, a classroom transformation just gets crazy looks from others, while I stay up all night trying to finish an activity for it. Just focus on the students. I'm not saying this will always be easy, but they are the reason you are going to all that work. The look on their faces after a room transformation, or the excitement of seeing them succeed, will make it worth it. It may not happen quickly, but you will be the teacher they remember, so continue to put your heart into it, even when its hard. 

focus on yourself

Obviously we do the things in our classroom because of the students, but we need to make sure that we are doing things that we want to do. Don't get lost in Instagram and blogs and put too much stress on yourself. The classes we see are not perfect all the time, and even though it may seem like other teachers can do it all, I'm sure they have their struggles, too. Don't try to live up to unreasonable expectations, just do what is best for your students and YOURSELF. 

Also take time for yourself. The more I follow other bloggers and instagram-mers, the more I hear and see them take breaks from social media to have time for themselves. This. Is. Hard. With so much to do, it is so hard to get up early to workout just because I know it'll make me feel better. It's hard to stay off social media when you're trying to promote TpT products. It's hard to set the grading aside for a day. Just remember how important it is, though and do it. As silly as it sounds, even taking an extra long shower and doing a face mask or going to get your nails done can help you feel so much better! 

find your support

Look to the people in your life who give you support and surround yourself with them during these times. Take time to goof off or vent to your teaching BFF. Go on a date with your significant other. Visit your family. We are not always surrounded by those who support us, but when you are feeling discouraged, you need to step away and find that support. If you are lucky enough to have someone at work like this, it can be so refreshing to just go in their room or office, close the door, vent or cry, and then laugh a little. Whoever it is, don't feel bad about it, just lean on them when you need it! 

We can do it, friends. In the end, it is all worth it and we are there because we love it. Times can be tough, but luckily, so are you! 


Share:

101st Day in K-4

I teach in a small, rural school district, with one teacher per grade level. Our kindergarten teacher found this post from Simply Kinder. Each year in the past for the 100th day of school, we have each had a center in our room, and the students rotate from room to room for about 15-20 minutes each. This could also be done within a grade level, rotating between classrooms.

This year, since we wanted to begin celebrating the 101st day of school instead, we wanted to do something different. We decided to each have a center in the library and allow the students to move around to the centers independently. We did encourage them to partner up and travel with someone (we tried to encourage them to pair with a student from a different grade).

To start the day, we encouraged students to wear polka dots, and the teachers dressed up like the Dalmatians, and of course, one teacher was Cruella de Vil.  We also made a dog house for students to enter when they arrived!

Before school, I also hid 101 Hershey kisses around the classroom. Some were very obvious and others were a little harder to find, but they were not intended to be very difficult. However, we only found 100...maybe I miscounted. I sure hope so! :)


We started with our centers right away. We used many of the ideas from Simply Kinder, and we also combined other centers we had done for the 100th day in the past. Students had a checklist that we hole-punched as they completed our center. They had to complete the list in order to receive a reward! We also had some coloring pages and 100th day STEAM activities that were not included in the stations for students who finished the centers quickly. Many of the students also returned back to their favorite station afterwards! You can see our centers on the list below, but remember that these are the ideas of others that we compiled! This includes Simply Kinder and the worksheet you can see from The Simplified Classroom!


After our centers, we practiced our math skills with some cooking by making Puppy Chow! We were the 101 Dalmatians after all! We doubled the batch and of course used those unit fractions with our measuring cups. I also split the chocolate covered Chex into sandwich bags for each student so they could each shake their own powdered sugar on their Puppy Chow.

I have to admit, I was a little worried about my students enjoying the 101st Day with the 101 Dalmatians theme being in 4th grade. However, we all found activities that were fun, active and creative for all ages, and my students loved it! I even decided to show the 1996 live-action version of 101 Dalmatians, which we all really enjoyed!

I love finding ways to bring fun themes and activities into fourth grade, and in an upper elementary grade where it is harder, the 101st day really gave my students the opportunity to be creative and have fun!


Share:

Monday, January 8, 2018

Steps for an Easy Transition to Flexible Seating


Flexible seating has been a hot topic for the past few years. I began to implement it three years ago, with some flexible seating options. When I first began, I wasn't ready to fully jump into flexible seating, so I found other ways to slowly transition. If you're like me, I hope these steps help you to make the switch. Our students' needs are so different than ours were when we were in school and I love how flexible seating gives them more comfortable ways to learn!


I have found that flexible seating works very well. My students can focus well, they learn responsibility of choosing their own seat, and they learn what seats work best for them. I was nervous to make the transition because it was unfamiliar and seemed to be chaotic, but I am so glad I finally made the full transition.

Have specific seat rules. 

When I first began, I had "special seats" that you chose and took back to your desk to replace your chair or make your chair more comfortable. Each seat had specific rules about how to use it, and we had a plan in place for what order students got to choose their seats. 

After I began full implementation, the seats stay where they are and you move to the seat you want. This works well for my class and I love that things aren't moving around anymore. 

Either way, the students needed clear rules on where the seats can go and how to use them. Exercise balls are a great example because those can easily be misused, as I'm sure you can imagine. Balls must stay on the ground and you can only gently bounce. Lap desks have a specific place they can be used. Stools must stay on all four legs. You get the idea. Just be clear with your students. If anything gets misused, I add rules or change how the seat is used. 


*Alternative* Take the seat to your desk. 

Not ready to jump into flexible seating but like the idea of choices? When I first started, I was not ready to give up the desks. I wanted a place where they could go back to their seats when I wanted everyone together. So, I found a way to incorporate their choice to this comfort for myself. It worked well at the time. They chose their seats in the morning when I drew their stick, they stacked their chairs and took it to their desk. 


Seats don't move. 

Once I was ready to fully transition, it was important that the seats stayed in their place. This helps students know the rules of the seats, and it also helps students from sitting by their friends. They quickly learn that choosing a seat next to their friend may not be the best choice for them. If they want to sit in a different type of seat, they move to the seat.


Make a routine for choosing. 

My class uses a magnetic choice board. My neighbor teacher has the students place their pencil pouch wherever they want their seat for the next day. Just make sure it becomes a routine. We choose our seats for the next day at the end of the day. This makes your mornings much easier as they can come in and go directly to their seats. Of course there are days that get crazy and we run out of time to choose, but it definitely makes the mornings a little crazier. Whatever way you decide to choose seats, make a routine out of it, as with everything we do in our classrooms.

My choice board is from Aly (Just A Primary Girl) and you can find them here

Make supplies accessible. 

I have always had tables, not desks, so I already had to have alternatives to storing materials. However, if you are getting rid of desks, you'll need to find ways to store supplies. I like putting supplies together as much as possible, so I collect all of their markers, colored pencils, crayons, etc. at the beginning of the  year and we keep them in buckets. Then, each table has a bucket that all students share. Then, I use these 3 drawer stands for students supplies. This is an investment at first, but mine have lasted four years so far (a couple drawers have tape holding cracks). I also made pencil cups out of Pringles cans covered in duct tape, but you could also use the zipper pouches or their own pencil cases. I have specific rules on what is allowed in the pencil cups (and have random checks where they can earn brag tags), to keep them from carrying too much around to each spot.


Find what's best for you. 

As I have said several times, I was nervous about changing to flexible seating at first, but it was such a great decision. If you are still debating, I hope that these steps will help you make an easier transition. It is seriously so worth it! I have parents who come in and look around and ask where the desks are, but if they could see my room when everyone is focused, they wouldn't even notice that there aren't desks! 


Share:

Thursday, December 28, 2017

Robotics in Reading


I am so excited about this post!

One of my passions is STEAM and technology in the classroom. I was able to get Dash and Dot Robots through a Donors Choose project for Maker Space.

To start, these are great robots for elementary. There are several different apps available for them to code, move the robots, control sounds, and complete challenges.

However, I knew I wanted to find ways to use the robots in core subjects. Our first project was a book report.

The focus of the book report was to create a storyline that the robot would follow. Once the storyline was made, the students could code the robot to follow the path of the storyline, adding words or symbols to represent events from their book.

I loved that this gave students the opportunity to show their comprehension of their story and practice coding a path that they created themselves.

I created a product on Teachers Pay Teachers for you to use. It includes all of the planning and drawing pages that we used, as well as detailed instructions and Common Core alignment. I also included several rubrics depending how you want to grade it. I think that it works best to give two separate grades, one for reading and one for science. This way you can be sure that the overlap does not negatively affect student grades in a subject. Their coding grade is mostly based on their effort, as many of my students are all at different places with their coding. Check out the product here!


The students really enjoyed this project because it was something different that combined reading and science in a very interactive way. I loved seeing them so engaged and incorporating two of my favorite things as well.


I am working on adapted versions for other types of robots as well, so check back for those and let me know if there are any types that you want to use this with! If you don't have robotics in your classroom, maybe a project like this is perfect to convince administration that they are useful! 


Share:
Design by Laugh Eat Learn // Theme by Pipdig